|
|
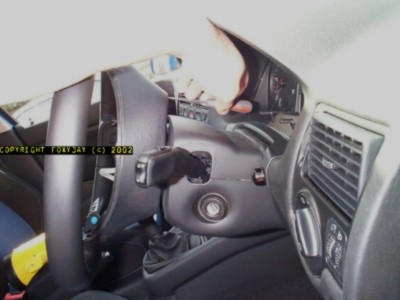
This page covers all the work on the new stalk switch. It all starts by getting the steering wheel off ! 1) Removing the airbag and wheel. DANGER!
Please Ensure the Battery is disconnected prior to removing of the
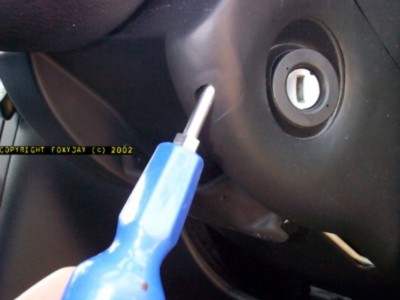
Airbag. Turn the steering wheel 90 degrees from the 'straight ahead' position. Using a mirror if required, look at the back of the steering wheel hub; the bit now facing the speedo binnacle area.
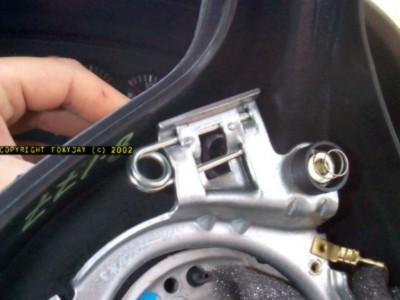
Insert a long, small screwdriver (flat), and you'll now have to lever open one of the retaining springs. (It's easier to see what you're levering, by looking at the inside view below) By levering upwards on the screwdriver handle, the tip will go downwards and the spring will open, allowing the airbag module retaining peg to be released.
Rotate the steering wheel back through 180 degrees, and repeat this process on the second and final securing spring. Carefully, now remove the airbag module far enough to un-clip the firing line wire (5cm or so) Lay the airbag module somewhere it won't get knocked or dropped (like on the back seat of the car). It can 'fire' if dropped, or be made inert. Return the wheel to 'straight ahead'. Using the M12 spline drive, and whilst holding the wheel tightly (not against the steering lock), turn the centre fixing bolt out, anti-clockwise. TIP: Mark the Steering Wheel & shaft with a Marker Pen to make refitting alignment easier
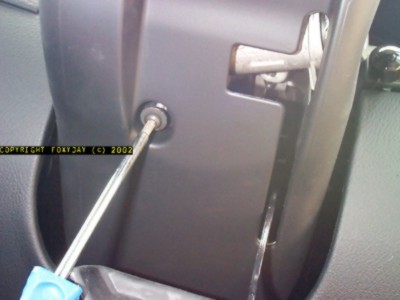
Now look at the bolt seat area on the top of the steering column - there should already be an alignment mark - if not, be sure to punch one. (the splines are very fine, so be accurate with marking)
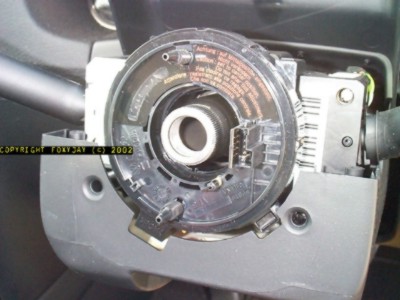
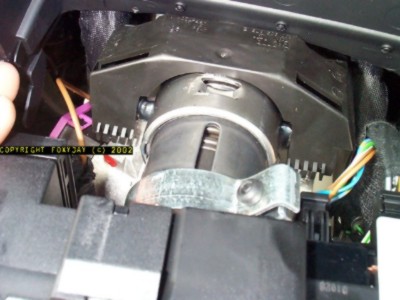
The wheel can be removed by pulling gently towards you. Note the location of the contact ring/indicator cancelling device wheel engagement peg, and remove this item by unclipping. Remove the plastic shrouding
around the steering column by un-screwing the small philips-head securing
screws in the deep recesses and the large exposed torx bolt under the
ignition switch.
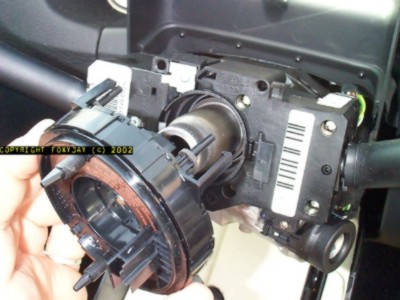
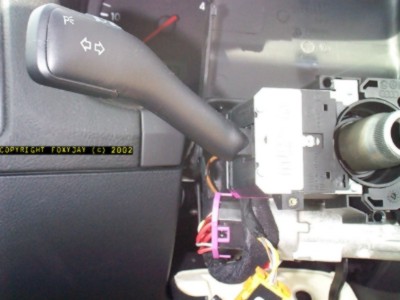
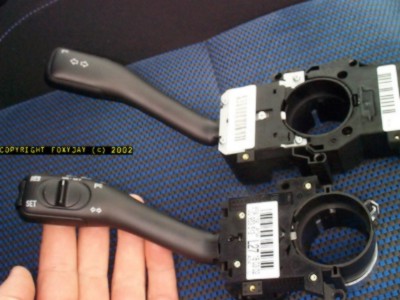
2) Removing and Replacing the Stalk Switch The stalks are both mounted onto the column as a unit, and need to be removed together. Slide out the steering column adjustment to give better access here if required.
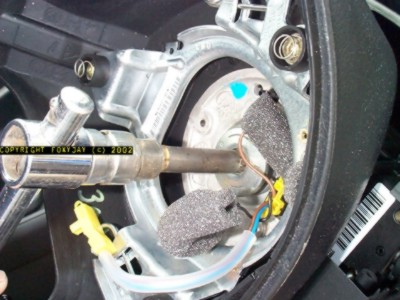
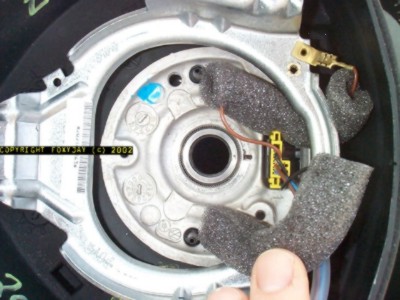
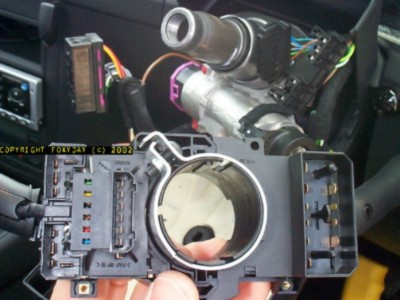
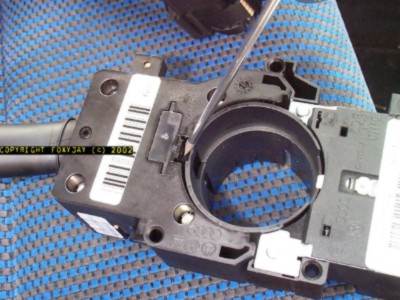
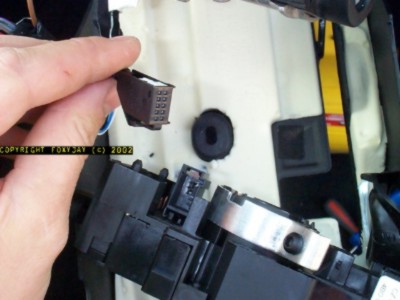
Slacken the unit mounting clamp bolt (black torx head on the shiny metal clamp in RH pic). Withdraw the stalk unit, and when accessible, unclip the loom plugs on both sides. The entire unit can be moved now and be split-down. Insert a small flat-blade as shown, lever the clip, and slide the two halves apart.
Retain the wiper stalk half, and slide-in the new cruise-control stalk to replace the original, until it 'clicks' securely home. Get the new wiring loom, and insert the 10-way black plug at one end, into the socket on the back of the new CC stalk unit. Re-assemble the stalk assembly back onto the column, plugging the two main loom connectors in reverse order of removal. Carefully thread the new loom wiring alongside the other wiring, down beside the steering column and push the 'loose end' and the slack wire into the 'behind dash' area, ready for the next stage. Clamp-up the stalk switch unit to the column shaft with the torx driver. Re-fit the column plastic shrouding. Refit the indicator cancelling unit. Carefully re-align and refit the steering wheel, noting the alignment marks. The wheel fixing bolt can apparently be removed/refitted up to five times before needing replacement & torque setting is 50Nm. Carefully offer the airbag module up to the wheel, refit the firing line wire, and re-clip the module pegs back into the spring fixings. Test everything disturbed to ensure it's all safe. END OF STAGE 1. To go to 'outside work', click here: Cruise- Outside To go to 'inside work', click here: Cruise- Inside
|