|
|
|
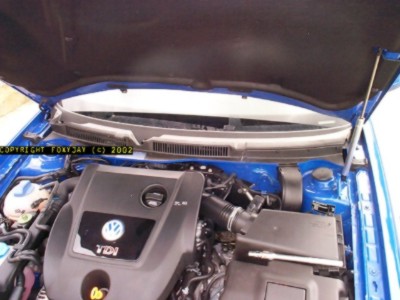
This page covers all the work outside the car. 1) Removing the scuttle panel. Open the bonnet fully, and get a good look at the gear below the windscreen. The black plastic running the entire width of the car must be removed. Not too tricky, but there's a trick to every step! With the wipers at natural rest position, use a small piece of electrical tape stuck to the screen each side to mark the position (beleive me, it's invaluable). Prize off the caps covering the wiper arm securing nuts. It's a 13mm socket you'll need to remove the nuts. The arms are secured onto splined shafts, having a tapered shoulder, so they do 'set' very tight. At this point, I closed the bonnet, lifted a wiper arm, and wiggled towards and away from the screen until it freed. If they're seized on you need to use the Silverline 702445 Wiper Arm Removal Tool, Remove both arms and set aside, remembering which is which side. Now remove the rubber seal at the junction of the bulkhead and the plastic scuttle.
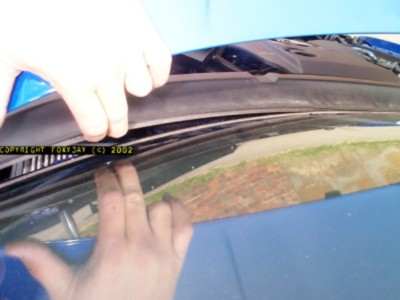
The plastic scuttle is next. This is securely clipped into the lower edge trim of the windscreen. To remove, first get your finger under the top edge, and work your way along, releasing it (in the direction perpendicular to the screen). Carefully ease it out of position, over the wiper arm shafts and set it aside.
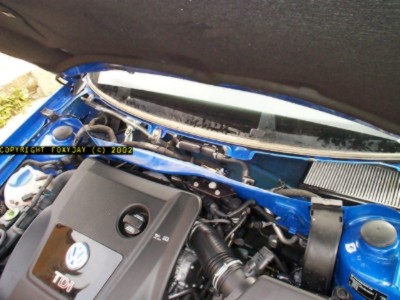
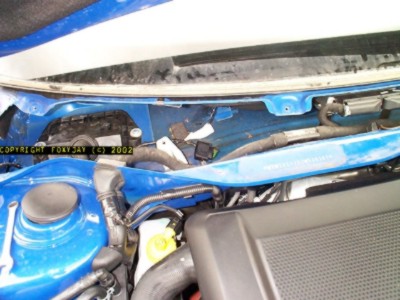
Looking at the open space now, you can see the cabin air filter to the right side, the ECU in the centre, and wiper mechanism to the left. 2) Removing the wiper mechanism. The wiper mechanism obstructs the cable socket box cover, so this has to be removed.
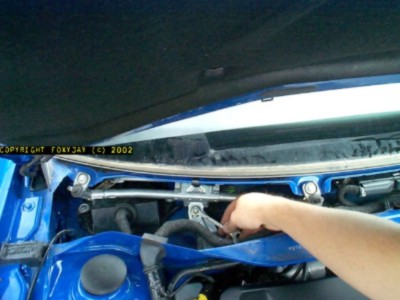
This is fixed in place with three bolts, 10mm size. Undo all these and remove, then unplug the wiper motor cable.
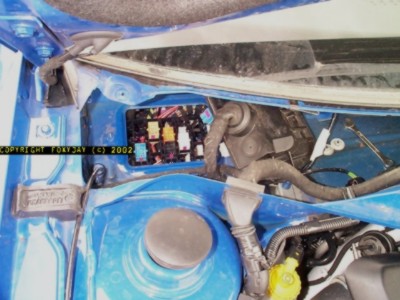
Carefully manouvre the wiper mechanism out of the space and set aside. This will give complete access to the cable socket box cover. 3) Accessing the cable socket box.
Now remove the two pressed nuts holding the cover of the cable socket box - these are 10mm. Slide the cover to one side and unplug all the sockets. The only socket involved in this project is the black one. If you can get to this from the inside as well, then unclip and drop the socket back in behind the dash, ready for the 'inside' work. Otherwise, carefully lever the clips beside the black socket carrier and slide it along out of it's retaining slots, so it can be lifted out and the black socket accessed from 'outside' (this is what I did).
You now need to carry out the operations 'inside' the car to go on further. END OF STAGE 2. To go to 'inside work', click here: Cruise- Inside To go to 'cruise stalk', click here: Cruise- Stalk
|