|
|
|
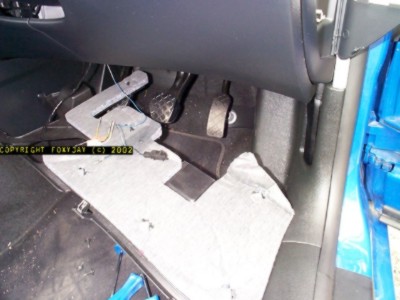
This page covers all the work inside the car... plus the bit in-between !! 1) Removing the dash plastics. This is the bit which involved dis-assembling the lower part of the dashboard above the drivers footwell. It's not a big job, so get a soft pad to kneel on, and your torch handy. The under-tray to the dash (above the pedals) is secured with seven T20 torx screws. Carefully pull the panel out and set aside.
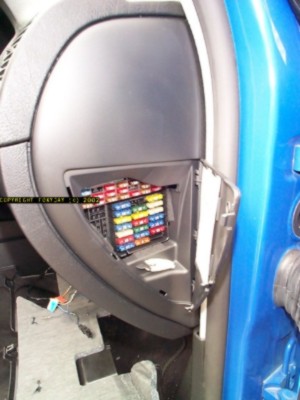
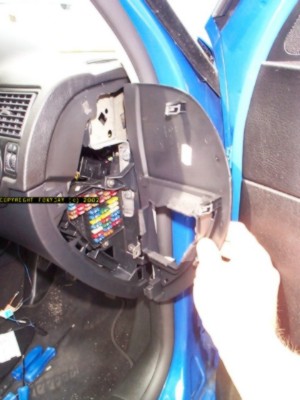
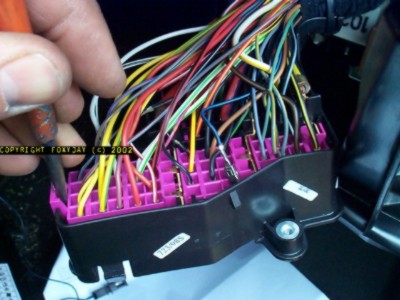
The fuse box is located to the right end of the dash - open the cover and carefully un-clip. The end surround, closing off the dash can also be un-clipped and all set aside. The curved plastic panel below the steering column area can now be removed. Unclip and set aside. The panel behind this can now be taken out by removing the T20 screws around the outer edges. Set aside once again. You should now have clear access into the under-dash areas on the driver's side. 2) Removing the fuse box. The fuse box must be removed from it's location by undoing two torx bolts.
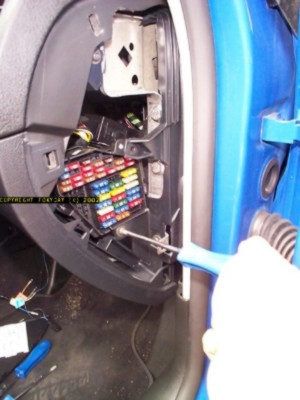
Slide the fuse box down to gain good access to it, and un-clip the back cover. Careful! as there are some fuses powered-up when the ignition is off. Stray metal objects could short-out!
Looking at the back of the fuse box, you will see the purple (magenta) plastic grid, which securely keeps all the terminals in place. 3) Working on the fuse box You will need to lever this into it's 'release' position with a screwdriver - it should 'click' into position.
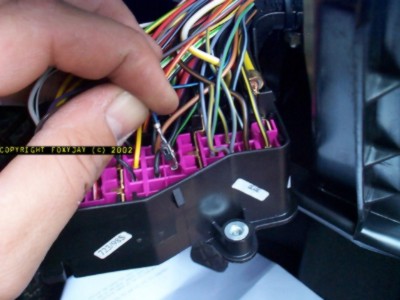
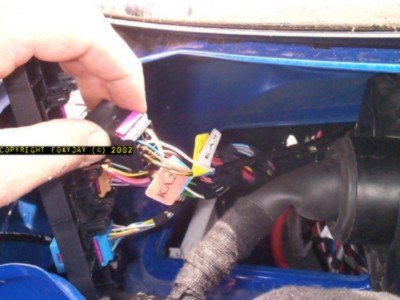
Locate fuse number 5. It is a mini-blade type, and should be 7.5A rated. Now, you need to carefully un-hook the black/blue striped wired leading to the terminal on the 'dead' side of this fuse. TIP: Use a Laser 3932 Tool to eject the wire or you can use an un-wound paper clip of the large variety, and slid the end of the clip wire up beside the terminal, from the front. The idea is to try and push the 'barbed' hooks (two) on both sides of the terminal, so you can pull it out.
With this terminal now removed, splay out the hooks if they were pushed back, and insert the terminal into the loose plastic clip that came with the Cruise Control wiring loom. (Part# 191972701).
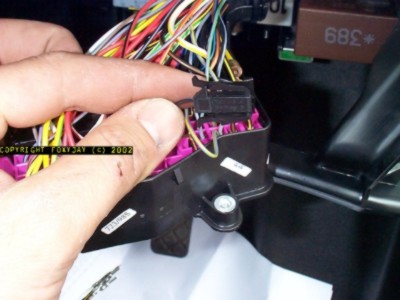
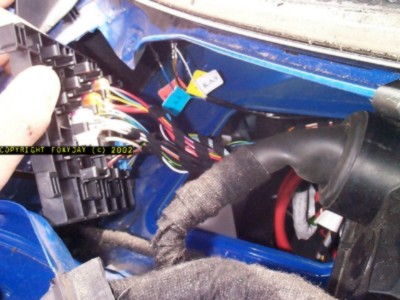
Now click the plug on the end of the loom (Part# 191972711) into this plug behind the fuse box. Insert the short black/blue cable of the new loom into the now spare fuse 5 chamber. Re-click the purple grid into it's original position on the back of the fuse box. Re-assemble the fuse box rear cover, ensuring the new CC wiring loom passes out along with the rest of the cables. Tie them together with a small wire tie. 4) Connecting the wiring loom Now, thread the 'loose' end of the new CC wiring loom (with the bare terminals) in behind the dashboard, following the other wiring routes, and push them up to the location of the main cable socket box. Working outside now, pull the terminals up through the aperture, and ensure the coloured tags are in place to identify the wires.
Now, taking the black socket, install all the new wiring loom terminals into their respecting numbered positions. Again, there is a purple securing grid on the back of the socker that will need clicking into it's alternative position whilst you insert the terminals. Be careful here to ensure the terminals go into the correct positions on the socket, as the ID numbers are moulded into the socket and are quite small.
Once all the terminals are in place, click the purple grid back, and re-seat the socket in it's holder. Click all the plugs back into their respective coloured sockets, and re-seat the mounting grid. Re-install all removed items in the reverse order of removal: Cable socket box Wiper mechanism Scuttle panel Wiper arms Bulkead rubber seal Fuse box Dash panelling Under-dash panel. 5) Enabling the cruise control To carry out this final operation, you will need to access the control codes for the ECU. This can be done in several ways. 1) Go to a dealer or specialist with a VW1551 or 1552 tool. 2) Use the VAS emulation software VCDS by Ross-Tech http://www.ross-tech.com/ VCDS Lite will work with a MK4 Golf Platform, cheap Chinese Cables are available for £4.86 from eBay Shop: eMicroPlus [Select] 16167 to De-activate cruise control
Please Note: Older Engines (Such as 2.8 V6 AGP) may require 00003 to activate cruise control or 00004 to deactivate the cruise control. For the VW Tool the following is the 'generic' procedure for carrying out this enabling work: Select
engine control module by pressing "01Q". When you switch the cruise control 'on' with the new stalk switch, and the ignition is 'on', the symbol should alight in the speedo. Turn the iginition 'off', remove the key, then proceed as normal to drive the car. Ensuring you have a clear open stretch of road, test the controls. You must have the stalk switch in the 'on' position for it to work. CHECK THE CRUISE CONTROL DISENGAGES WHEN THE BRAKE OR CLUTCH IS PRESSED (be ready to knock it out of gear when testing the clutch switch!) WELL DONE - IT WASN'T THAT DIFFICULT WAS IT? END OF STAGE 3. To go to 'outside work', click here: Cruise- Outside To go to 'cruise stalk', click here: Cruise- Stalk
|